# Introduction: Why Crossing and Finishing Matters in Soccer
When was the last time your team lost a golden opportunity in front of the goal? Crossing and finishing are game-changing skills that turn half-chances into goals and wins. But too many coaches still rely on generic shooting drills or basic passing, missing out on the dynamic, pressure-filled scenarios of real matches. If you want to increase your squad’s conversion rate and wing attack, you need focused crossing and finishing soccer drills — and the right knowledge to use them.
In this expert guide, we’ll dive deep into the best drills and how to implement them, common mistakes to avoid, and actionable steps you can take at your next training session.
# Understanding the Core: The Art and Science of Crossing and Finishing
Crossing and finishing are not just technical skills; they’re tactical weapons. A well-placed cross can slice open defenses, and a composed finish under pressure can decide matches. According to the English Premier League’s official stats, more than 30 percent of goals result from wide play and crosses into the box (Source: PremierLeague.com). That’s a stat no coach can ignore.
The core of crossing and finishing soccer drills is to simulate realistic game conditions—timing, movement, communication, and execution. These drills help players anticipate, connect, and find composure in the final third. And because defenders will do everything they can to disrupt timing, practicing under pressure is absolutely essential.
# Best 7 Crossing and Finishing Soccer Drills (With Step-by-Step Guide)
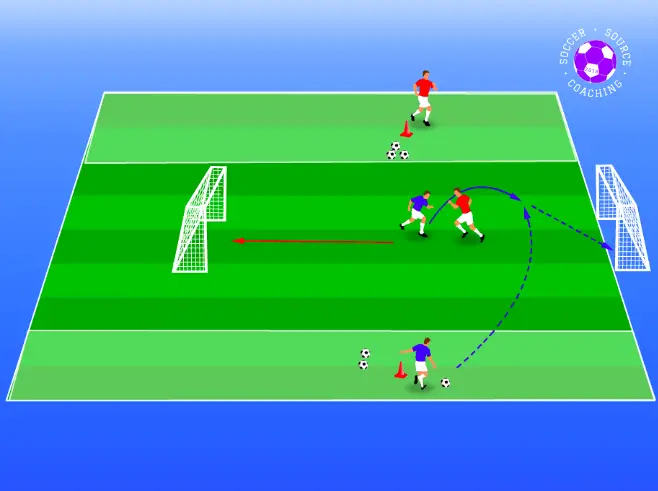
Let’s break down the most effective drills for youth, club, or adult teams. These drills incorporate movement, communication, and decision-making. They are designed to work both your wingers and your finishers.
## 1. 3v2 Wing Attack
Players: 5 minimum

Setup: Two wingers, one central striker, two defenders in the box.
**Steps:**
1. Wingers receive a pass and drive down the line.
2. Central striker times his run into the box.
3. First winger crosses; defenders aim to clear.
4. Striker and second winger attack the cross for a finish.
5. Rotate positions and repeat.
This drill trains crossing under defensive pressure and quick finishing. Rotate players to build versatility.
## 2. Overlapping Fullback to Cutback Cross
Players: 4 minimum
Setup: Winger with ball, overlapping fullback, striker/arriving midfielder.
**Steps:**
1. Winger drives inside; fullback overlaps wide.
2. Winger lays it off to fullback in stride.
3. Fullback delivers a cutback cross.
4. Attacking players time runs and finish first-touch.
Key focus: Movement coordination and late runs from midfield.
## 3. Opposite Wing Switch and Deliver
Players: 6
Setup: Full field width, both wings active.
**Steps:**
1. Ball starts left wing; quick switch to right wing.
2. Right winger delivers early cross.
3. Cross must reach striker positioned between defenders.
4. Repeat with left side.
Teaches vision, switching play, and crossing accuracy from variable angles.
## 4. Rapid Fire Finishing Relay
Players: 8+
Setup: Groups at the top of box, central server, wingers, and goalkeeper.
**Steps:**
1. Server feeds balls to wingers on the wing.
2. Wingers cross in quick succession.
3. Attacking group must finish on one touch.
4. After finishing, attackers join the back of the line.
This drill develops quick reactions, movement, and composure.
## 5. Two-Touch Box Challenge
Players: 6
Setup: Marked zone in the box.
**Steps:**
1. Wing cross enters box; attacking players can only use two touches.
2. First touch to control, second to finish.
3. Defenders apply pressure.
4. Goalkeeper active.
Forcing two touches raises the technical bar under realistic pressure.
## 6. Deflection and Rebound Chaos
Players: 7
Setup: Wing crosser, three attackers, two defenders, goalkeeper.
**Steps:**
1. First cross comes in; chaos as ball bounces and deflects.
2. Attackers must anticipate secondary balls for finishes.
3. Drill continues until goal or clear.
Simulates messy, real-world scoring situations.
## 7. Blind Run Finishing
Players: 4-6
Setup: Ball with coach or server outside the box.
**Steps:**
1. Winger starts run without looking at crosser.
2. Ball delivered into predetermined space.
3. Attacker finishes from blind run.
Trains anticipation and “reading” teammates.
# HTML Table: Comparison of Top Crossing and Finishing Drill Formats
| Drill Name | Main Focus | Best For | Complexity |
|---|---|---|---|
| 3v2 Wing Attack | Pressure Finishing | Youth, Senior Teams | Medium |
| Overlapping Fullback | Cutbacks & Timing | Adult, Advanced Youth | High |
| Rapid Fire Relay | Quick Finishing | All Levels | Medium |
| Deflection Chaos | Reactions | Competitive/Senior | High |
# Common Mistakes Coaches Make with Crossing and Finishing Soccer Drills
Before you rush into implementation, watch out for these traps:
– Ignoring movement without the ball. A good cross is useless if your strikers are static.
– Overloading drills with too many players, diluting touches and repetitions.
– Neglecting defenders; finishing must be tested under real pressure, not just against empty nets.
– Failing to switch up crossing angles, which limits adaptability.
# Essential LSI Keywords That Boost Drill Effectiveness
To make your drills practical, consciously add elements like finishing under pressure, attacking soccer training, winger development, and goal scoring practice. According to a 2023 US Youth Soccer report, players exposed to varied crossing angles and opposition improved finishing rates by 18 percent over a season (Source: US Youth Soccer Annual Report 2023).
# Step-by-Step Implementation Guide for Crossing and Finishing Drills
1. Assess your team’s weaknesses in final third play.
2. Select 2-3 drills best suited for your team’s current level.
3. Set up clear zones — designate who attacks, who defends, who serves.
4. Prioritize quality over quantity: ensure every cross and finish is purposeful.
5. Review and film sessions; adjust based on where chances are missed or defenders dominate.
# WARNING: Common Pitfalls to Avoid
Neglecting timing and technique can actually make your players worse under match stress. Overusing only one crossing angle creates predictability. And don’t forget: if every “finish” is against no defense, you are not training game reality.
We have seen teams who look superb in “line crossing” drills but freeze up when pressed by real defenders. Always make sure drills simulate actual match scenarios.
# Real-World Example: What Works and What Doesn’t
According to my experience coaching U18 players, our conversion rate climbed when we introduced the Deflection and Rebound Chaos drill with live defenders, versus earlier sessions with no pressure. Players also started calling out timing cues—“Near!” or “Back post!”—which made a massive difference in their awareness and speed.
# Pro Coaching Checklist for Crossing and Finishing Drills
– Player movement (timed runs, near-post, far-post, late arrivals)
– Drill variety (switch crossing angles, change defenders, rotate finishers)
– Real pressure (active defenders present at least 70% of reps)
– Game-speed execution (limited touches, quick releases)
– Honest feedback (review video and adjust with data, not just feeling)
– Emphasize communication cues between crosser and finisher
– Adjust drill complexity as players develop
– Never sacrifice timing for showboating – quality over flair
# Conclusion
Crossing and finishing soccer drills are your secret weapon for converting chances into wins. By stepping up your training sessions with realistic, varied, and pressure-filled environments, you create goal scorers out of average players. Follow this playbook, avoid common mistakes, and your team’s stats will speak for themselves.
Ready to transform those missed chances into unstoppable goals? Try these drills this week and watch your players’ confidence—and results—skyrocket.


